
| 일 | 월 | 화 | 수 | 목 | 금 | 토 |
|---|---|---|---|---|---|---|
| 1 | 2 | 3 | 4 | 5 | ||
| 6 | 7 | 8 | 9 | 10 | 11 | 12 |
| 13 | 14 | 15 | 16 | 17 | 18 | 19 |
| 20 | 21 | 22 | 23 | 24 | 25 | 26 |
| 27 | 28 | 29 | 30 |
- includes
- 회고록
- jsx
- 노드
- vue.js
- React calculator
- props
- html
- Node.js
- map
- 키다리 개발 일지
- closure
- 키다리의 개발일지
- React.js
- react
- component
- 키다리 개발자
- Element
- DoM
- wep
- Rendering
- 시맨틱
- tag
- ecma
- scope
- CSS
- javascript
- ES6
- web
- 볶음밥
- Today
- Total
키다리 개발자
React.js 계산기 만들기(state, props, map) 본문
저번에는 HTML과 Javascript로 계산기를 만들어보았으며(Javascript 메뉴에 글 기재함),
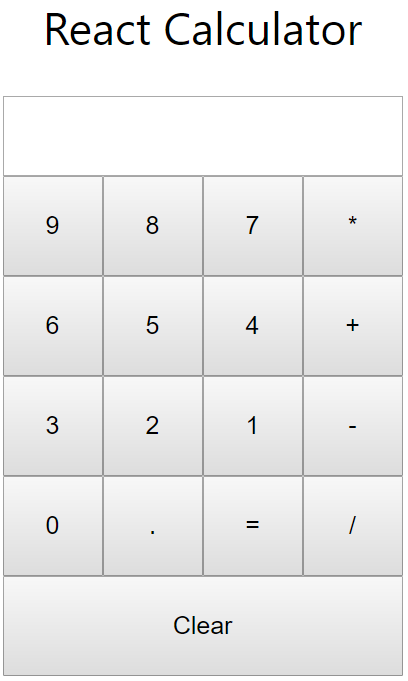
이번에는 React만을 이용하여 계산기를 만들어 보았습니다.
만든 방식과 원리는 저번과 비슷하며, 이번에는 React의 state를 이용한 것과 큰 차이가 없습니다.
state는 자기 자신의 상태를 나타내 주는것으로, setState로 상태를 재설정해 줍니다.
Html 구조 코드 vs React.js (state, props, map)코드 비교하기
바로 첫번째 소스코드는 React.js에서 state를 이용해 Html구조로 구성한 코드입니다.
보시다시피 위의 계산기 기능으로서는 전혀 문제없이 구현되었습니다.
하지만, component없이 한 번에 다 소스코드를 작성하였기에 코드가 길어지고,
엄청 많은 버튼들이 들어간다면 코드가 더 길어질 것이며, 재사용 효용성이 매우 떨어집니다.
HTML 구조로 작성한 계산기 코드(State)
|
1
2
3
4
5
6
7
8
9
10
11
12
13
14
15
16
17
18
19
20
21
22
23
24
25
26
27
28
29
30
31
32
33
34
35
36
37
38
39
40
41
42
43
44
45
46
47
48
49
50
51
52
53
54
55
56
57
58
59
60
61
62
63
|
import React from "react";
import "./App.css";
class App extends React.Component {
state = {
input: ""
};
addToInput = num => {
console.log({ input: this.state.input + num });
this.setState({ input: this.state.input + num });
};
calculateResult = () => {
this.setState({ input: eval(this.state.input) });
};
render() {
return (
<div className="row-wrapper">
<div className="name">
<span>React Calculator</span>
</div>
<div className="row">
<button onClick={() => this.addToInput(9)}>9</button>
<button onClick={() => this.addToInput(8)}>8</button>
<button onClick={() => this.addToInput(7)}>7</button>
<button onClick={() => this.addToInput("*")}>*</button>
</div>
<div className="row">
<button onClick={() => this.addToInput(6)}>6</button>
<button onClick={() => this.addToInput(5)}>5</button>
<button onClick={() => this.addToInput(4)}>4</button>
<button onClick={() => this.addToInput("+")}>+</button>
</div>
<div className="row">
<button onClick={() => this.addToInput(3)}>3</button>
<button onClick={() => this.addToInput(2)}>2</button>
<button onClick={() => this.addToInput(1)}>1</button>
<button onClick={() => this.addToInput("-")}>-</button>
</div>
<div className="row">
<button onClick={() => this.addToInput(0)}>0</button>
<button onClick={() => this.addToInput(".")}>.</button>
<button onClick={() => this.calculateResult()}>=</button>
<button onClick={() => this.addToInput("/")}>/</button>
</div>
<div>
<button
className="clear-button"
onClick={() => this.setState({ input: "" })}
>
Clear
</button>
</div>
</div>
);
}
}
export default App;
http://colorscripter.com/info#e" target="_blank" style="color:#4f4f4ftext-decoration:none">Colored by Color Scripter
|
React.js (state, map)코드
한눈에 비교해봐도 같은 계산기의 코드인데, 더 간결하고 유지 보수 및 효용성이 높아짐을 볼 수 있습니다.
<NumberButton addToInput={this.addToInput} num={data} />)); 는
자식 component(NumberButton)에 props로 넘겨주기 위한 것입니다.
버튼 한 줄을 배열로 받아서(숫자 및 문자 삽입) map을 사용해 각 data를 반복시켜 props로 넘겨주기 위한 작업입니다.
|
1
2
3
4
5
6
7
8
9
10
11
12
13
14
15
16
17
18
19
20
21
22
23
24
25
26
27
28
29
30
31
32
33
34
35
36
37
38
39
40
41
42
|
import React from "react";
import NumberButton from "./components/NumberButton";
import "./App.css";
class App extends React.Component {
state = {
input: ""
};
addToInput = num => {
this.setState({ input: this.state.input + num });
};
calculateResult = () => {
this.setState({ input: eval(this.state.input) });
};
createRow = arr =>
<NumberButton addToInput={this.addToInput} num={data} />
));
render() {
return (
<div className="row-wrapper">
<div className="name">
<span>React Calculator</span>
</div>
<div className="row">{this.createRow([9, 8, 7, "*"])}</div>
<div className="row">{this.createRow([6, 5, 4, "+"])}</div>
<div className="row">{this.createRow([3, 2, 1, "-"])}</div>
<div className="row">{this.createRow([0, ".", "=", "/"])}</div>
</div>
);
}
}
export default App;
http://colorscripter.com/info#e" target="_blank" style="color:#4f4f4ftext-decoration:none">Colored by Color Scripter
|
component로 button 재사용 효용성 높이기(props)
props로 넘겨 받은 것들
- props.addToInput()
- props.num
onClick을 실행시키는 버튼들을 component에 담아 재사용의 효용성을 높이는 것입니다.
component : 하나의 레이아웃의 단위로 재사용할 수 있게 만든 꾸러미
|
1
2
3
4
5
6
7
8
9
10
11
12
13
14
15
16
|
import React from "react";
const NumberButton = props => {
return (
<button
onClick={() => {
props.addToInput(props.num);
}}
>
</button>
);
};
export default NumberButton;
http://colorscripter.com/info#e" target="_blank" style="color:#4f4f4ftext-decoration:none">Colored by Color Scripter
|
확실히 첫 번째 HTML로 작성한 코드에서는 onClick과 소스코드들이 남발했는데,
더욱 간결해지고 많은 버튼들이 생겨났을 때 or 수정할 때 용이하겠죠?
'React.js' 카테고리의 다른 글
| React Router (SPA, Route, Link) (0) | 2020.01.23 |
|---|---|
| CSS Module (React 컴포넌트 스타일링) (1) | 2020.01.15 |
| React 클래스 컴포넌트와 함수형 컴포넌트의 차이점 (0) | 2020.01.09 |
| React Hooks (useState, useEffect) (0) | 2020.01.07 |
| React 리액트란? (0) | 2019.11.28 |


